Indeni 6.0 Installation and Licensing - how to
Fresh Install
See the official documentation on how to get and install your indeni server.
Licensing
By default all Indeni instances have a 15 day 5 device limit. you will want to get that extended and expanded.
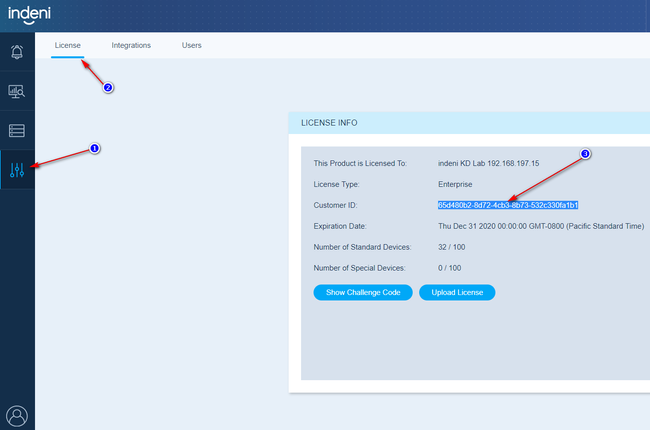
- Log into the WebUI
- Go to Settings → Licenses. Copy the Customer ID and send it to Robert, product@indeni.com. Someone from the product or support team will provide you with a .lic file to upload.
- Once you have the .lic file, upload the .lic file using the Upload License button. No reboot or restarts necessary.
Sign your own certificate
If you'd like to use a signed certificate you need to make sure that the certificate and key is in p12 format (also known as pfx).
The p12 format combines the certificate and key into one file which is protected by a password.
For more information about converting certificates, please refer to this page.
- Copy the p12 file to /usr/share/indeni-ds/
- Open up /usr/share/indeni-ds/config.js
- Locate these two lines:
config.ssl.keystore = process.env.KEYSTORE || "/usr/share/indeni-ds/indeniserver.p12";
config.ssl.passphrase = process.env.KEYSTORE_PASSPHRASE || "xxxxxxxx"; - Change the path "/usr/share/indeni-ds/indeniserver.p12" to match that of your certificate.
- Change the passphrase from "xxxxxxxx" to the password you used to protect your p12 file
- Save the file, run imanage and choose option 3 (Restart Indeni services)
- xxxxxxxx is a placeholder for the password used to protect the default certificate so this string may vary.
Shouky Dan reported that Indeni's Frontend Team is currenlty working on an issue where the config file is over-written when the indeni-ds servcie is updated. Thus it might be a good idea to save a copy of the file in the home folder.